Now we’ve got the DynamoDB things out of the way (for now), I want to start experimenting with my very own custom skill for Alexa. My goal is to create my own smart mirror custom skill. It needs to handle all sorts of stuff, but let’s start with the basics.
Before I start creating my own, I first want to understand how it all works exactly. That’s why I will start by creating a skill from the samples delivered by Amazon. Let’s download the samples from GitHub into a new folder.
mkdir alexa-skills-kit-samples
git clone https://github.com/amzn/alexa-skills-kit-js.git ./alexa-skills-kit-samples
The next thing we need to do is log on to the AWS console. It’s important to choose the correct region in the top right corner. There are only a few regions where the lambda service is available. Since I’ve made the DynamoDB table in another region I will probably have to redo the earlier DynamoDB steps, but those are worries for later. I’ve chosen this region :

Navigate to the lambda service, and click “Get Started Now”. The lambda service lets you create your very own piece of code in the cloud. It is executed only when it is called, so you only have to pay for the little amount of time it runs. Furthermore, every one who registers is entitled to 1 million free runs of any lambda function per month. So, in our case that’s actually free.
Next, we are prompted to choose a template. There are several templates, some of which are intended for Alexa lambda functions. We won’t be using a template since we’ll be uploading the sample code, so I just chose “Blank Function”.

Next, the service asks me which application will trigger the lambda function. Just choose “Alexa Skills Kit” and click “Next”.

Next, we need to configure some stuff, like a descent name and a runtime . In our case, we will be writing the code in NodeJS, so i’ll use this one, but we can choose other runtimes as well.

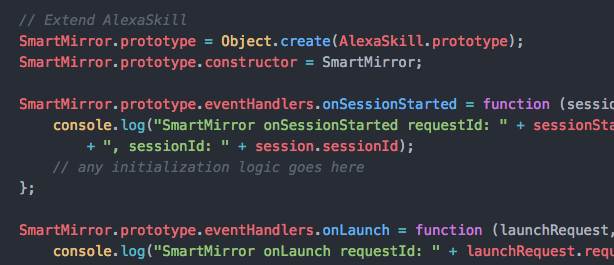
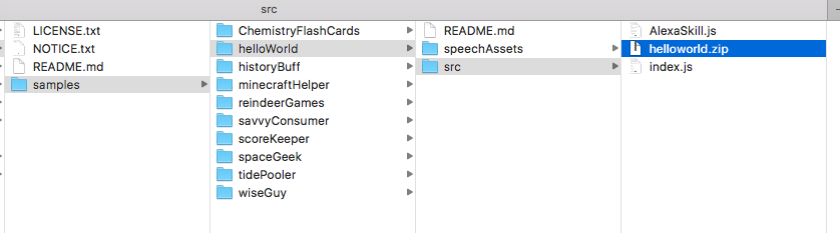
Now, we can specify the code for the lambda function . There are several ways to do so, the simplest of which is probably just typing the code in the browser . The disadvantage here is the lack of highlighting, code completion, etc. It’s not an IDE. Instead I will zip the files in the “src” folder of the “helloWorld” sample, and upload it.
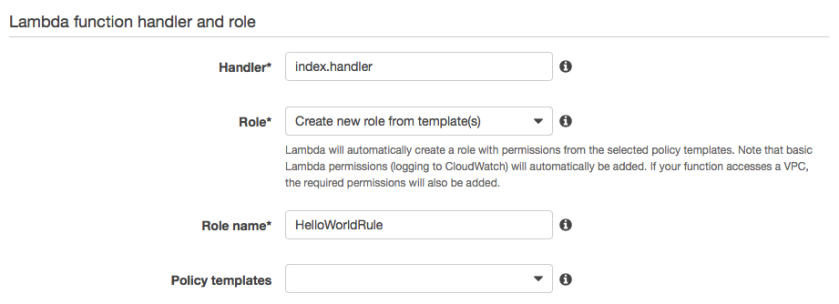
Choose “Upload a .ZIP file” as the code entry type. Leave the handler as it is, and make sure “Create new role from template(s)” is selected. Specify your own rule name.

Create the function. In the next screen you should see the ARN (Amazon Resource Name), that looks about like this :

Just copy it to the clipboard.
Now for the second part. We need to make a new Alexa skill to call the lambda function. In order to do that we need to navigate to the amazon developer console & log in. In the “Alexa” tab, we can choose to create a new skill by selected the “Alexa Skills Kit”.

So now, we start the configuration of the skill. First of all I’ll choose a custom interaction model. The Smart Home and Flash Briefing skills are a fixed type of interaction specifically intended for those purposes. Since we’re creating something custom, we choose the first one. We’ll choose “English” as a language. While I’m writing you can also choose for English UK and German. I hope that in the future, more languages will appear here, specifically dutch as that is my mother tongue.
Anyway. I’ll give it a fitting name “HelloWorld”, and specify an invocation name. This is the words Alexa listens for in order for the skill to be recognized. There are a number of limitations and constraints to what you can specify here. Carefully read the documentation.
I don’t want the audio player functionality.

Click Next. Now we need to specify 2 things :
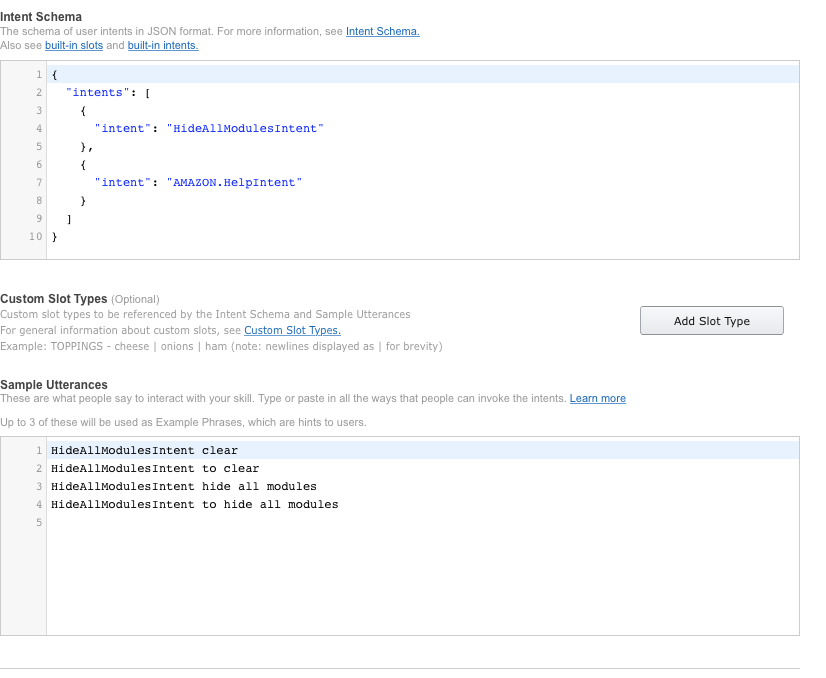
- An intent schema
- Sample Utterances.
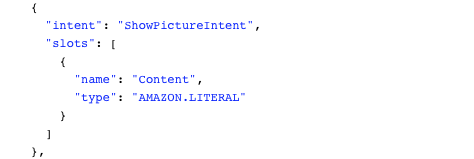
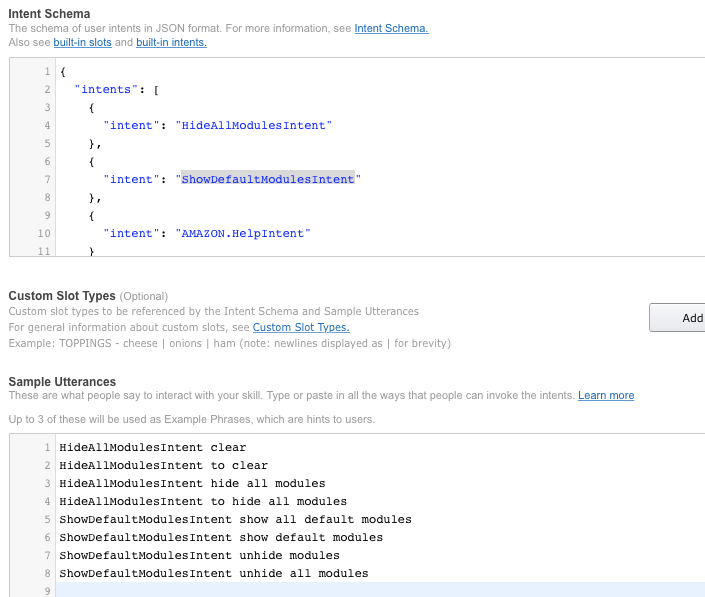
The first one is a specification in JSON format telling Alexa what the skill can do, and what parameters it can expect. The definition of what Alexa can do in that skill is an intent. Alexa will interpret the user’s voice and based on the sample utterances, it will deduct what the intent of the user is. It will then execute the code for that intent. For the “Hello World” example, Amazon has provided the schema and the utterances for us.

Just copy past them in the appropriate boxes.
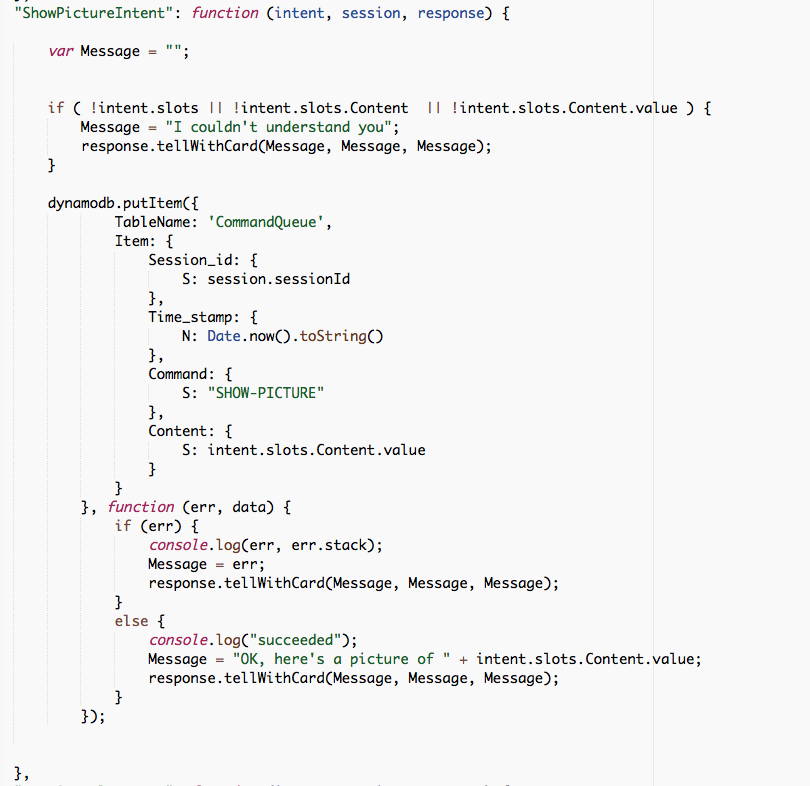
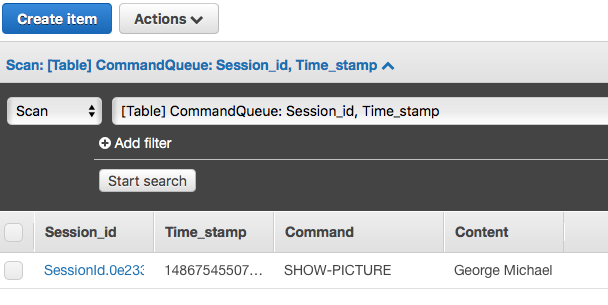
Notice you can create “slots”. These slots are kind of parameters you can pass a long. Such as “show a picture of George Michael”. George Michael (or any other person or thing you want to see a picture of) will be a slot of string type. Alexa will then recognize it, and pass it along as a parameter. For this example we’re not going to use a slot, there aren’t any specified in the schema.

In the sample utterances, you can specify how Alexa will recognize a certain intent. The utterance starts with the name of an intent and is followed with some words Alexa needs to interpret. Now… Alexa is pretty smart. You don’t really need to input every single permutation of words here. For example : if you say “say hello to the world” (with the extra “the” in there), it will probably understand as well. Alexa uses language models to create a context in which the user is interpreted, and he or she usually speaks. Depending on that model (which it builds on the fly) it will better recognize your intent.
The last configuration step is linking the lambda function and the skill to each other. Choose “AWS Lambda ARN” as the endpoint type, and paste in the ARN. No account linking is necessary here.
Not that you could be specifying different ARN’s for different languages. Isn’t that the coolest thing?

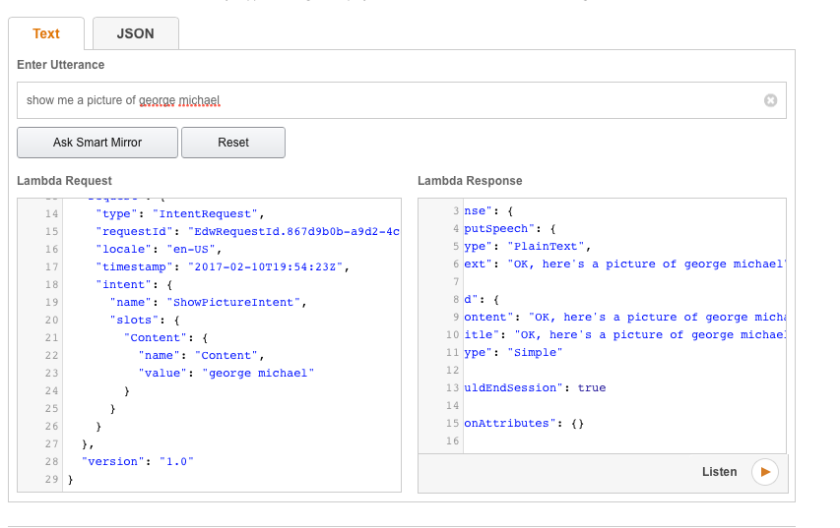
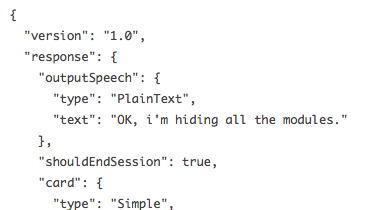
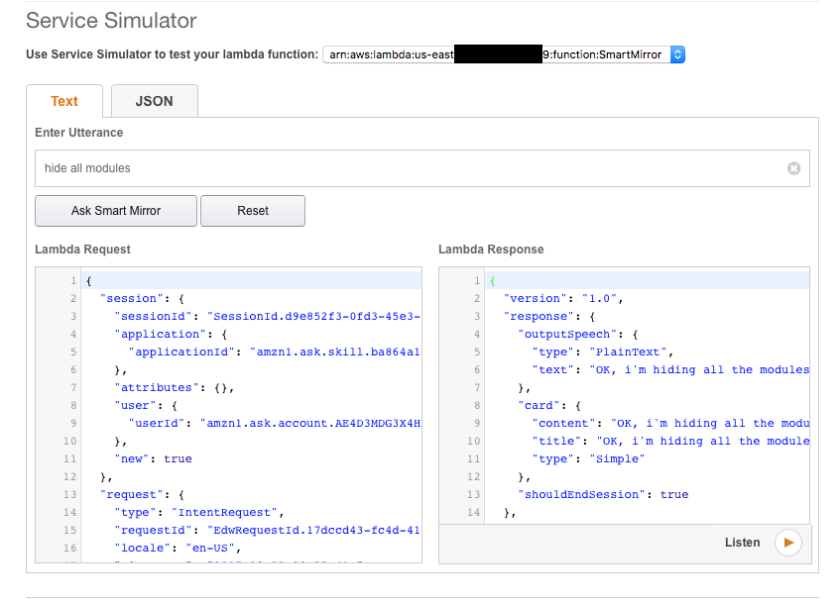
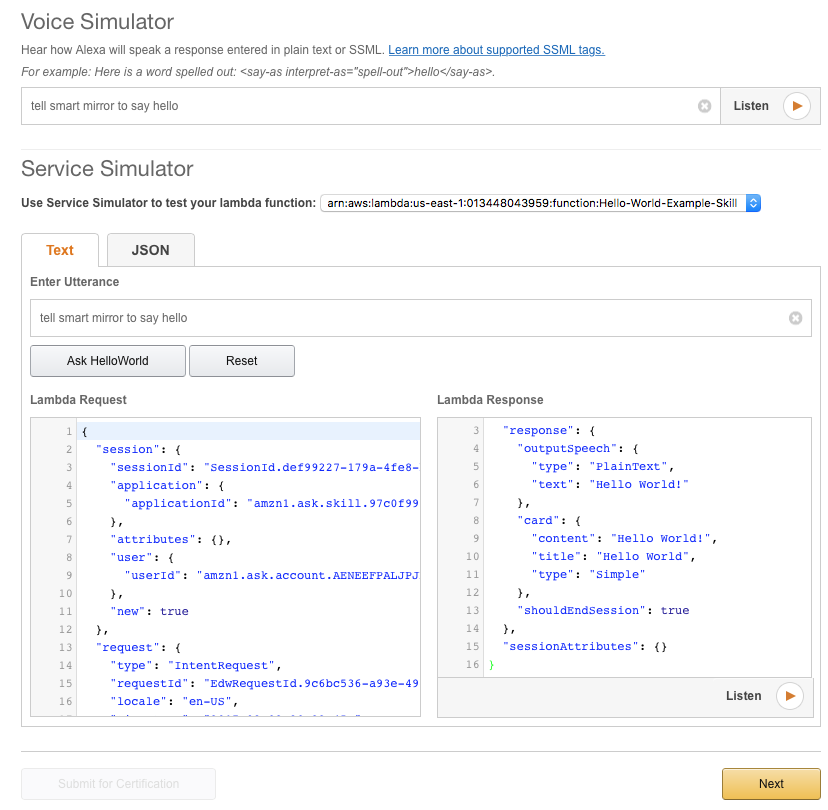
In the next step you can test it. Just type what you would say to alexa, end you can see how the lambda request is built up, and what the response would be.
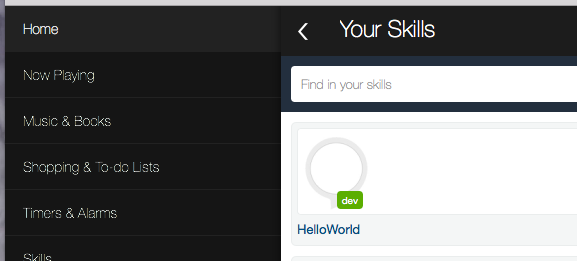
You could go and certify this thing, but I don’t thing Amazon would be too happy having all the hello world examples on the store, so I suggest you don’t. Even “uncertified”, the skill should be available to you if you navigate to “alexa.amazon.com”, and log in with your account.
So, the last thing we need to do is tell the lambda function what the ID of the calling application is. That way we ensure that the function can only be called by the Alexa skill we set up. Doing that is easy. Just go to the AWS console, and locate the “Hello world” lambda function, and edit the code.
Change the APP_ID to match the application ID of your Alexa skill :
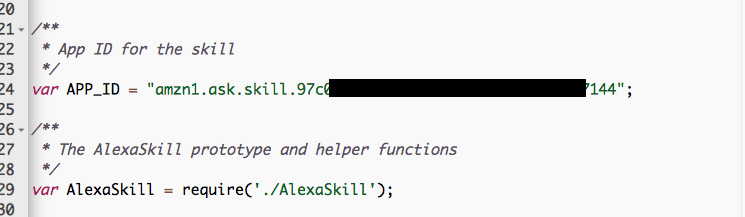
You can find it in the definition of the skill :

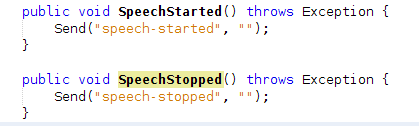
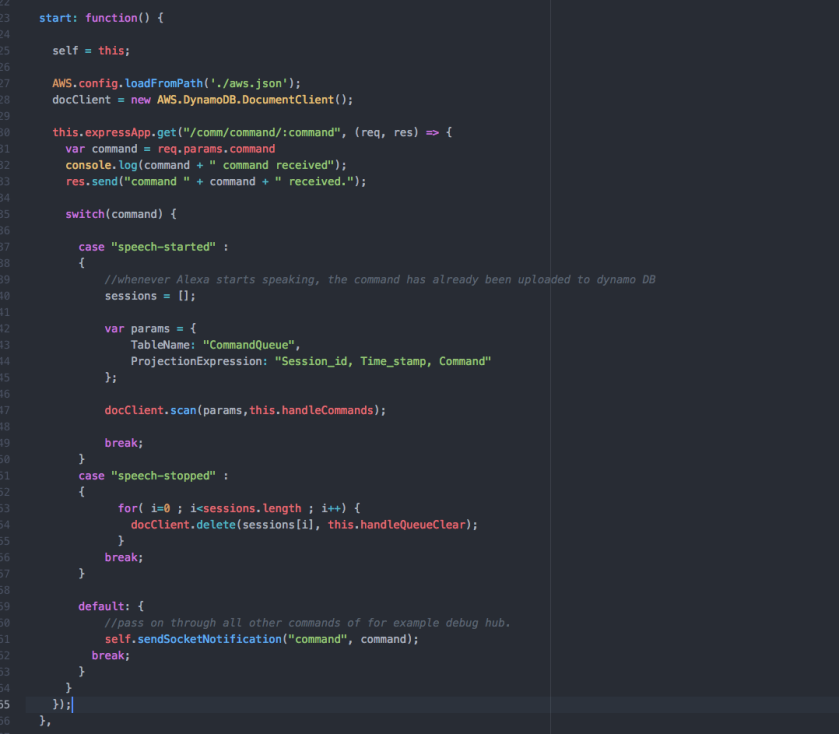
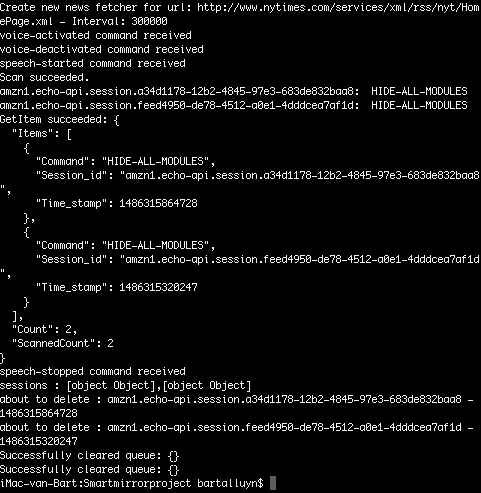
I couldn’t help but add my own personal touch…

Go ahead and test this.
Good luck!